EASY
TO USE

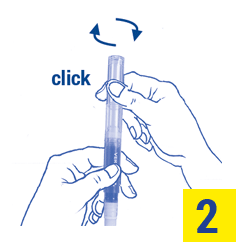
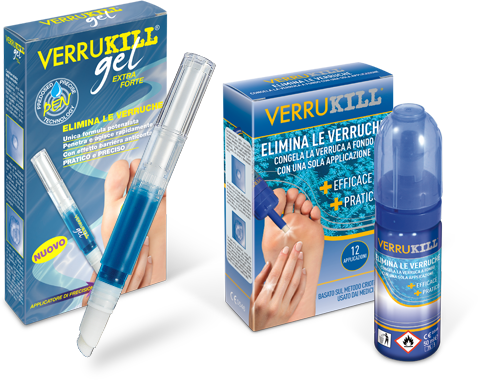
The first time you use the VERRUKILL GEL Pen for Warts, you need to turn the top of the pen clockwise to load the Gel into the application tip. Some turns are needed so that the internal piston visible in transparency goes to compress the gel which, when it reaches the tip of the applicator, makes visible the formation of the drop of gel ready for application on the wart.
EASY
TO USE

The first time you use the VERRUKILL GEL Pen for Warts, you need to turn the top of the pen clockwise to load the Gel into the application tip. Some turns are needed so that the internal piston visible in transparency goes to compress the gel which, when it reaches the tip of the applicator, makes visible the formation of the drop of gel ready for application on the wart.

Fase 1
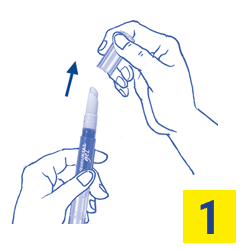
Togliere il cappuccio di protezione posto nella parte inferiore della penna a copertura dell’applicatore.

Fase 2
Posizionare la penna in posizione verticale, con l’applicatore rivolto verso il basso, girare in senso orario la parte superiore della penna, assicurarsi che il gel defluisca fino a formare una semi-goccia sulla punta dell’applicatore-microforato.

Fase 3
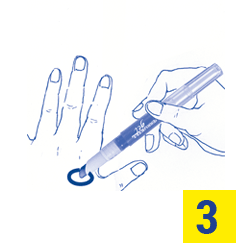
Utilizzando l’apposito “applicatore di precisione”, applicare attentamente il Gel sulla parte superiore della verruca, (non sulla pelle sana circostante). Assicurarsi che la superficie della verruca sia completamente ricoperta in maniera uniforme, da un sottile strato di Gel-Turchese, facilmente visibile in contrasto con il colore della pelle, appositamente studiato per facilitare l’utilizzatore ad effettuare l’applicazione con precisione.

Fase 4
Lasciare asciugare il Gel per 5 minuti prima di indossare indumenti o calzature, dopodiché il Gel si trasformerà in una “pellicola protettiva”, che aderisce alla zona trattata, quindi protegge e mantiene la medicazione in loco affinché agisca efficacemente; dopodiché la pellicola si autoelimina.
Step 1 – Remove the protective lid that covers the applicator on the bottom of the pen.
Step 2 – Hold the pen vertically with the applicator pointing downwards and turn the top of the pen clockwise, making sure that the gel is released and starts to form a drop on the tip of the micro-perforated applicator.
Step 3 – Using the special “precision applicator”, carefully apply the gel to the top of the wart (not on the surrounding skin). Make sure that the wart is covered evenly with a thin layer of the turquoise gel, which contrasts clearly with the colour of the skin and is specially designed to make it easier for the user to apply the gel precisely.
Step 4 – Leave the gel to dry for five minutes before dressing or putting on shoes. After five minutes the gel will turn into a “protective film” that sticks to the treated area, protecting the treatment and keeping it in place so that it works effectively; the film will then come off by itself. Any excess film must be removed before applying the subsequent treatment.
The Verrukill Gel treatment does not require the use of a plaster to protect it. The protective film creates a “barrier effect” that covers the wart correctly and helps prevent contagion. It is also waterproof, meaning that you can wash your hands and shower whenever you wish.
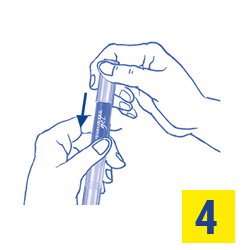
Step 5 – After each use, wipe the pen tip with a tissue. Before putting it away, replace the applicator cover lid and push it on as far as it will go to keep the pen airtight.
After each use, wipe the tip of the pen with a tissue.
Before putting it back, reposition the applicator cover and push it all the way down to seal the pen tightly.
For more information about the product fill out the form below.
Our customer care will answer soon as possible.


